|
|

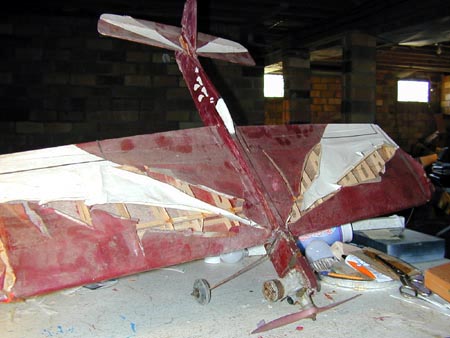
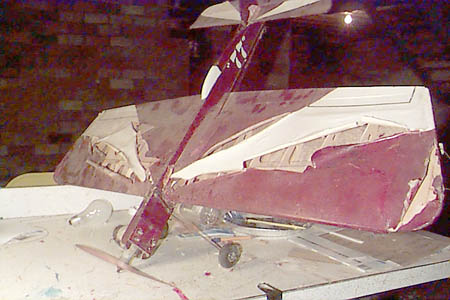
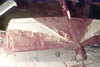
Dec 24, 2001:
This is what my Johnny Casburn "Lucky Sport" looks like
today. See text for details. |
One of my
favorite models I built and flew is the Lucky Sport by Johnny
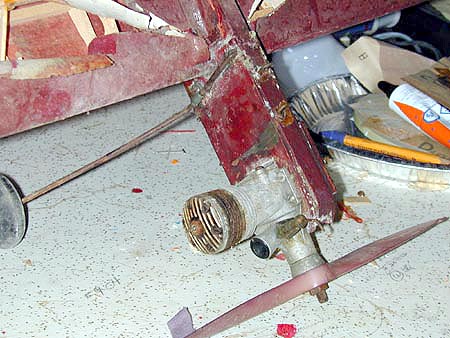
Casburn. Mine was powered by a K&B Stallion .35, and it was a
wonderful performer, despite my sloppy construction techniques back
when I was 13.
I bought this
kit from a place called J&J Hobbies in Springfield,Missouirl. I
think the owner's name was Jack. He was as kind and helpful as anyone
could be. He was real u-control expert, and I learned a lot in the
few times I got to talk to him. I stopped in to see him when I was in
town to visit my sister and brother-in-law, who lived there.
Springfield had a nice park with several paved ukie circles and a
carrier deck. One year we went back to for a visit and he was gone.
The store had disappeared and the phone number was no longer listed.
The Lucky
Sport, nicknamed "Big Mo" (a reference to its Missouri
heritage), held up well despite several crashes. I landed it inverted
a few times, and crashed when my lines got tangled in some corn
stalks ... it went up and over into the ground, breaking the fuselage
at the leading edge of the wing. The repair is still solid, but the
tail feathers are loose now, and over the past 20-plus years, the
horizontal stab and elevator have warped beyond repair.
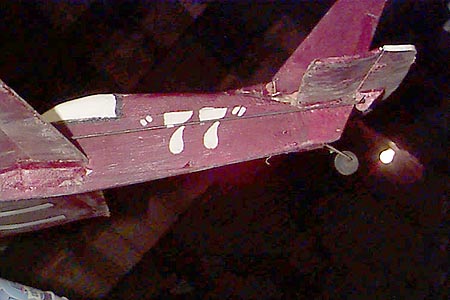
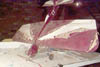
The silkspan
split some years ago along the white-maroon border. I'm not sure why,
but I've seen the same thing happen on some other two-toned silkspan
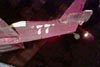
and dope jobs. The "77" on the side of the fuse refers to
my high school graduation year. I painted that on there in the summer
of 1975. I freehand painted another "77" on the bottom of
the outboard wing.
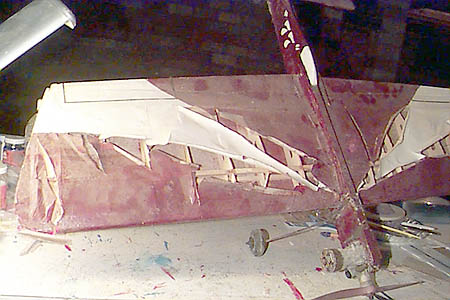
Of my
screw-ups on my Lucky Sport, I've recently found that I didn't fit
the ribs very well (several warped, or split over time). I must have
had trouble with the wing tips; the inboard wing I built without any
bracing. The outboard wing had bracing only on the top of the
wingtip. I had used significant amounts of hotglue to secure the
wingtips too. The leading edge is off center, and therefor, it sticks
out past the final inboard rib. Didn't matter, cuz I didn't bother to
cut it off! I also didn't do much sanding or prep work. Everything
still looks pretty rough. I'll remedy that.
I plan to
strip the old covering off, replace the warped stab and elevator,
make needed repairs and then recover it. I'm undecided on what sort
of paint job to go with (original as I had it or something
different). It will definitely be a silkspan and dope job, though.
|

|

 |

Click thumbnails
at left to view
larger photos. |
|
DEC
24, 2001: This afternoon I
spent time at the workbench on Big Mo. I stripped the covering off
both wings. It came off in large pieces without a lot of trouble.
Except for the splits along the white portion, the covering was still
strong and flexible. I've got some work to do on a few ribs, and the
fuse isn't as solidly glued to the wing at the leading edge as I
would like. All in good time. I've already purchased balsa for the
new tail surfaces. I had forgotten that I originally put Iron Crosses
on each of Big Mo's wings. I somehow got a hole in the covering that
ruined one of them, so I had to paint over both.
JAN
7, 2002: The covering came off the wings fairly easily.
It's funny, when I built Big Mo, I don't think I touched it with a
sanding block. The leading edge balsa looks like it did when it came
out of the box! All of the ribs and other cut balsa look the same,
too. The fuselage wasn't sanded much either, but I was more
interested in getting it built than making it a showpiece. I removed
the warped rudder, stab and elevator. I used hot glue and epoxy for
at least one repair (shudder!) on the tail feathers. Thank God it
held! I've also removed the "fillet" of hot glue I used
along the wing and fuselage. I have to figure out how to attach the
wing properly to the fuse; unlike most planes, the center section of
the wing is not sheeted to provide a solid surface for the
wing/fuselage connection. The center rib is doubled under the
fuselage, and I suspect that the ribs are supposed to glue to the
fuselage. However, both ribs are damaged in mine, mainly due to the
extra openings I carved from them for the bellcrank throws. There's
not much there for strength.
Options? I've
considered taken the plane apart further so I can trace the fuselage
and wing ribs for duplication later. Replacing the center ribs is
impossible without taking the wing totally apart. And I'm not sure
the rib/fuselage connection would be very strong anyway. I may put
balsa sheeting on the center of the wing. This would strengthen it
considerably. The problem is the ribs are full height -- they aren't
designed to be sheeted. I'll have to gingerly cut them down for the
sheeting to fit nicely.
MARCH
1, 2002: I sought advice from the Control Line forum at
the FlightLines Web site about how to best secure the wing and
fuselage since the wing wasn't originally sheeted. No one had much
new to offer. Because of the splintered ribs (and the fact the
wing/fuse joint was loose anyway) I separated the wing and fuselage.
It really
looks like I've rekitted it at this stage. I plan to trace some of
the plane's parts while I've got it mostly disassembled. I'll trace
the fuse, vertical and horiz. stabs, elevator, etc. When I'm done, I
should be able to nearly build a Lucky Sport from scratch -- which is
what I'll have to do if I crash the one I have.
My goal now is
to get it traced and reassembled. I haven't done much toward that.
MARCH
10, 2002: I haven't done a thing with "Big Mo"
since I disassembled it. The parts are separated enough to trace most
of it for duplication, which is my goal. I want to build a new Lucky
Sport, but to do it, I'll have to leave mine apart for a while. The
wing will be the most difficult part, but even that won't be
impossible. I'll have to try to calculate the right amount of balsa
to buy. Being a profile ship, there's not a great deal of difficulty
with building or buying parts for it. |